A Well-Loved Banana Bread Recipe That Is Often Asked For
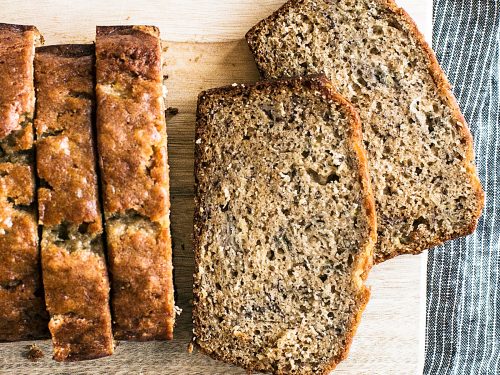
### Moist and Tender Banana Bread Recipe
This banana bread recipe is soft, moist, and brimming with delicious banana flavor. It’s an excellent method to make use of ripe bananas for breakfast, snacks, or even the freezer.
#### Flavor Profile
– **Flavor**: Sweetened with brown sugar, cinnamon, and abundant banana flavor, baking up soft and tender with a crumb that melts in your mouth.
#### Tips for Success
– **Budget Tip**: This recipe is ideal for utilizing those overripe bananas so they don’t go to waste.
– **Time-Saving Tip**: Short on time and your bananas are browning? Unpeel and freeze 4 at once in a Ziploc bag for easy baking later!
– **Freezing**: This banana loaf freezes well. Wrap the entire loaf or individual slices for a quick snack on the go.
### Banana Basics
– **Bananas**: Opt for very ripe bananas with lots of brown spots for optimal sweetness. If using frozen ones, squeeze out any excess liquid prior to mixing. About 4 medium ripe bananas provide 1 cup.
– **Flour**: This recipe calls for all-purpose flour as the main ingredient. You may substitute up to ⅔ cup of it with whole wheat flour. Spoon and level the flour for a light, airy banana bread.
– **Butter**: Use unsalted butter. If using salted butter, omit the salt. You can substitute some of the butter with oil for added moisture.
– **Sugar**: Sugar imparts the sweet flavor and soft texture to this banana bread, so don’t skip, swap, or reduce it.
### Banana Bread Variations
One of the greatest features of banana bread is the options for customization:
– Incorporate nutmeg or substitute pumpkin pie spice for cinnamon.
– To create banana nut bread, include toasted nuts like walnuts or pecans.
– Garnish the loaf with pumpkin seeds or sunflower seeds.
– Mix in mini chocolate chips, raisins, or shredded coconut.
### How to Make Banana Bread
Making the perfect banana bread is simple with just a few straightforward steps:
1. Whisk together the dry ingredients.
2. Cream together the butter and sugar. Incorporate bananas, eggs, and vanilla.
3. Combine dry ingredients with wet ingredients. Mix well.
4. Bake until a toothpick inserted comes out clean.
#### Additional Tips
– To hasten the ripening of bananas, bake them in the oven at 350°F until the peels blacken, around 15 minutes. Allow to cool before using.
– Mix just until combined to keep the banana bread tender and moist.
– Oven temperatures can differ. Check the loaf early and avoid overbaking.
– If the top browns too swiftly, tent it with foil towards the end of baking.
– Allow the loaf to cool completely before slicing for neat, even pieces.
### How to Store Banana Bread
– For optimal results, store moist banana bread in an airtight container at room temperature for up to 4 days.
– Freeze loaves or slices by tightly wrapping them in plastic wrap or placing them in an airtight container for up to 4 months.
– Warm slices quickly in the microwave or toaster for a soft, comforting treat.
### Ripe Banana Recipes
Did you enjoy this Banana Bread recipe? Share your rating and thoughts below!

15 Simple Dishes Highlighting Protein-Packed Tuna Recipes
These simple tuna recipes transform canned tuna into swift lunch ideas and tasty dinners! They’re high in protein, budget-friendly, and come together in no time, ideal for meal prepping.
Here’s a tip for a meal that’s economical, easy to prepare, and has a long shelf life: a can of tuna. It may seem a bit classic, but canned tuna is rich in protein and omega 3’s, making it a simple and cost-effective meal option.
I’ve dedicated years to perfecting tuna recipes in my kitchen, discovering how adaptable and flavorful this protein can be! It’s budget-friendly, shelf-stable, packed with protein, and cooks more quickly than nearly anything else in your kitchen. Here are some of my top canned tuna recipes that create easy meals.
15 Tuna Recipes for Easy Meals
These patties made from canned tuna are flavorful on the inside and golden crispy on the outside, seasoned with Old Bay, parsley, and Dijon mustard. You can serve them like traditional burgers with all the condiments or on a bed of greens. They vanish quickly at my home (my kids especially enjoy them!).
This tuna rice bowl recipe is a simple dinner option that’s ready in 20 minutes! A blend of savory tuna, fresh cucumber, and spicy mayo creates a fulfilling weeknight meal that’s wallet-friendly and high in protein. 20 grams of protein and under $5 per serving!
This protein-rich salad is a favorite among readers: blend canned tuna with crunchy veggies, feta cheese, olive oil, and a kick of Dijon mustard for a tasty salad that works great over greens or with crackers. This recipe perfectly fits into my Mediterranean diet meal plan and doesn’t taste like an ordinary tuna salad.
Crusty bread hugs a creamy, savory blend of tuna and crunchy vegetables, topped with melty cheddar and a ripe, juicy tomato! As an author of cookbooks, it’s unexpectedly one of my preferred comfort foods: each bite is sheer melted bliss.

Protein-Packed Tahini Hot Cocoa Recipe
# Indulgent Protein-Packed Tahini Hot Chocolate
If you’re in search of a luxurious, refined hot chocolate made with nutritious components, this recipe is for you! We’ve been indulging in this creamy, tahini-enhanced, fantastical hot chocolate, which has even won over cocoa enthusiasts.
Even though it’s sweetened naturally and combined with water, it boasts the perfect sweetness, a rich chocolate flavor, and a smooth finish. It cleverly incorporates healthy fats, fiber, protein, and cinnamon to help regulate blood sugar levels. Savor it as is or top it with your preferred whipped cream for the ultimate comforting delight.
## Protein-Packed Tahini Hot Chocolate Ingredients
This is not your standard hot chocolate! It’s exceedingly creamy, lavish, and packed with healthy ingredients. Here’s what you will need to whip it up:
– **Cocoa powder** – a plentiful amount of cocoa powder ensures this beverage is extremely chocolaty, almost akin to a drinking chocolate!
– **Tahini** – tahini is one of our favorite ingredients for its health advantages (hello vitamins, minerals, and healthy fats), and it contributes a beautiful thickness, richness, and nutty taste to this hot chocolate.
– **Sweetener** – we enjoy a mix of maple syrup (or honey) and a medjool date, but you can substitute almost any sweetener here. The date imparts a caramel-like taste and enhances the creaminess!
– **Sea salt** – a small pinch is all it takes to elevate the flavors. Furthermore, salt + tahini + maple = MAGIC!
– **Cinnamon** – provides a hint of additional sweetness and benefits for blood sugar balance.
– **Collagen** – if you’re into protein-rich hot chocolate, do include the collagen! Together with the tahini, it gives one serving of hot chocolate a substantial 15 grams of protein and adds more creaminess. If you’re vegan, your hot chocolate will still be wonderful without it!
– **Coconut milk powder + water // milk of choice** – there are plenty of options when it comes to selecting your milk. We like a combination of coconut milk powder and hot water to create a super creamy, rich dairy-free “milk,” but you can easily use coconut milk for both or opt for another milk you favor (almond, oat, and cashew would all be fantastic).
## How to Prepare Tahini Hot Chocolate
When it’s time for hot chocolate, mix everything (including the hot water) in a heat-safe blender (one that has a lid with a vent to allow steam to escape). Blending makes it extra frothy and helps break down the date. Avoid sealing the container tightly, as hot liquids can cause pressure to build, potentially leading to an explosion.
What if you lack a heat-safe blender? Or any blender at all? You could make this beverage in a saucepan on the stovetop and use coconut sugar (or another sweetener) in place of a date. Optionally, you could then use a handheld frother to achieve creaminess and frothiness!
We can’t wait for you to test this hot chocolate! It’s:
– Luxurious
– Creamy
– Chocolaty
– Perfectly sweet
– Frothy
– Fantastical
– Fiber- & Protein-packed
– Nourishing
– SO scrumptious!
This is the ideal cozy drink for the holiday season, for recharging after frolicking in the snow, or any moment you crave something indulgent yet nourishing. It pairs beautifully with holiday cookies, particularly anything chocolatey.
## More Cozy + Nutrient-Rich Beverages
If you give this recipe a try, let us know! Leave a comment, give it a rating, and don’t forget to tag a photo on Instagram. Cheers!
### Recipe
**Prep Time:** 5 minutes
**Total Time:** 5 minutes
**Servings:** 1 (12-ounce) serving
### Ingredients
– 2 Tbsp cocoa powder
– 1 Tbsp tahini
– 1 pitted medjool date (or 2 tsp coconut sugar, or other preferred sweetener)
– 1/2 tsp maple syrup or honey (if not vegan)
– 1 pinch sea salt
– 1 pinch ground cinnamon
– 2 Tbsp collagen peptides (omit if vegan)
– 2 Tbsp coconut milk powder (or leave out and substitute the hot water with warmed milk of choice)
– 1 ¼ cup very hot water (or milk of choice)
### Instructions
1. For optimal results, combine all ingredients in a high-speed blender with a vented lid to allow steam to escape. If you don’t possess a blender, heat on the stovetop, skip the date, and replace it with additional sweetener of choice (or blend ingredients with cold

Shepherd’s Pie featuring Sweet Potato and Turkey
Turkey Sweet Potato Shepherd’s Pie
Preparation Time: 15 minutes Cooking Time: 45 minutes Total Duration: 1 hour Servings: 6
A delightful shepherd’s pie featuring sweet potatoes, turkey, and a variety of vegetables!
Ingredients
- 1 1/2 pounds sweet potatoes, peeled and chopped
- 3 cloves garlic, peeled
- salt and pepper to taste
- 2 tablespoons oil (or butter)
- 1 pound ground turkey (or beef or chicken)
- 1 cup onion, chopped
- 1 cup celery, chopped
- 2 cloves garlic, minced
- 1 teaspoon rosemary, minced (or 1/2 teaspoon dried)
- 1 teaspoon thyme, minced (or 1/2 teaspoon dried)
- 1 teaspoon sage, minced (or 1/2 teaspoon dried)
- 2 tablespoons tomato paste (optional)
- 2 tablespoons all-purpose flour (gluten-free for gluten-free)
- 1 cup chicken broth (link) (or beef broth)
- 1 tablespoon Worcestershire sauce (gluten-free for gluten-free)
- 2 cups frozen peas and carrots (or frozen peas, or frozen vegetable mix)
- salt and pepper to taste
Instructions
- Combine the chopped sweet potatoes and whole garlic cloves in a pot, cover with water, bring to a boil, and cook until the sweet potatoes are soft, approximately 15-20 minutes.
- Drain the water and mash the sweet potatoes and garlic, seasoning with salt and pepper to taste, and set aside.
- In the meantime, heat the oil in a large skillet over medium-high heat, add the turkey, onion, and celery, and cook, breaking the turkey apart while it browns, for about 10-15 minutes.
- Incorporate the garlic, rosemary, thyme, sage, and tomato paste, sprinkle in the flour, stir, and cook for an additional minute.
- Pour in the broth and Worcestershire sauce, stir, bring to a boil, then reduce the heat and let simmer for 5 minutes.
- Stir in the frozen vegetables, allow them to heat through for about 5 minutes, then season with salt and pepper to taste.
- Transfer the meat mixture to the bottom of an 8×13 inch baking dish, and top with the mashed potatoes.
- Bake in a preheated 350F/180C oven until the edges are bubbling, roughly 20-30 minutes.
Optional: Stir melted butter into the mashed sweet potatoes.
Optional: Incorporate 1/4 cup heavy/whipping cream into the mashed sweet potatoes.
Optional: Mix in 1/4 cup grated parmigiano reggiano (parmesan cheese) to the mashed sweet potatoes.
Note: I used a package of frozen peas and carrots, which saved me time on dicing carrots. If you opt for just frozen peas, add 1 cup of diced carrots along with the onions.

A Simple Thai Basil Chicken Recipe
# If You’re Searching for a Super Tasty and Quick Dinner, This Thai Basil Chicken Stir Fry is Perfect for You
Thai basil chicken is a cherished dish that merges the lively flavors of Thai culinary traditions with the ease of a swift stir fry. This meal is not only scrumptious but also provides a fantastic taste return for little preparation time, making it an excellent selection for hectic weeknights.
## What is Thai Basil Chicken?
Thai basil chicken, referred to as “Pad Krapow Gai” in Thailand, is a favored stir-fry dish crafted with ground chicken or chicken pieces, Thai basil, garlic, Thai chilies, and a savory sauce. It’s typically served alongside fluffy white rice and may also be topped with a crispy fried egg. This dish is a staple for many when longing for genuine Thai flavors.
## How to Prepare Thai Basil Chicken Stir Fry
### 1. Prepare All of the Ingredients
Begin by making the sauce. In a small bowl, combine oyster sauce, soy sauce, dark soy sauce, and sugar. Mince the garlic, chop the chilies, rinse and dry the basil, and slice the chicken into uniform pieces.
### 2. Sauté the Aromatics
Heat oil in a wok or skillet. Add the minced garlic and chopped chilies, frying briefly until fragrant but not browned.
### 3. Cook the Chicken
Introduce the chicken to the pan and cook, stirring until it turns golden brown and is fully cooked.
### 4. Incorporate the Sauce
Stir in the prepared sauce and allow it to reduce slightly, ensuring the chicken is evenly coated.
### 5. Add the Basil
Take the pan off the heat and stir in the fresh basil. Serve immediately over rice.
## Ingredients Needed to Make Thai Basil Chicken
– **Sugar**: Provides a touch of sweetness to balance the flavors.
– **Oil**: For frying the components.
– **Garlic**: Minced for aromatic flavor.
– **Chicken**: Thighs are preferred for their juiciness, but breasts can also be used.
– **Oyster Sauce**: A crucial ingredient that adds depth and umami.
– **Soy Sauce**: Regular and dark soy sauce for flavoring and color.
– **Thai Chilies**: For heat; adjust according to your spice preference.
– **Thai Basil**: Essential for its distinct flavor; can be substituted with sweet basil if needed.
## Ground Chicken vs Chicken Thighs vs Chicken Breasts
Thai basil chicken can be prepared with ground chicken or chopped pieces of chicken thighs or breasts. Ground chicken is often chosen for its convenience, while larger pieces can offer a more substantial texture. Select based on your personal preference.
## What to Serve It With
This dish pairs wonderfully with fluffy white rice, which soaks up the flavorful sauce. You can also serve it over noodles or with a side of fresh cucumbers for a crunchy element. For added indulgence, think about topping it with a crispy fried egg.
## Is It Spicy?
Typically, Thai basil chicken has a spicy kick due to the presence of Thai chilies. However, you can modify the spice level by using fewer chilies or removing the seeds.
Relish this quick and simple Thai classic that delivers amazing flavors to your dinner table in roughly 20 minutes!

A Well-Loved Banana Bread Recipe That Is Often Asked For
### Moist and Tender Banana Bread Recipe
This banana bread recipe is soft, moist, and brimming with delicious banana flavor. It’s an excellent method to make use of ripe bananas for breakfast, snacks, or even the freezer.
#### Flavor Profile
– **Flavor**: Sweetened with brown sugar, cinnamon, and abundant banana flavor, baking up soft and tender with a crumb that melts in your mouth.
#### Tips for Success
– **Budget Tip**: This recipe is ideal for utilizing those overripe bananas so they don’t go to waste.
– **Time-Saving Tip**: Short on time and your bananas are browning? Unpeel and freeze 4 at once in a Ziploc bag for easy baking later!
– **Freezing**: This banana loaf freezes well. Wrap the entire loaf or individual slices for a quick snack on the go.
### Banana Basics
– **Bananas**: Opt for very ripe bananas with lots of brown spots for optimal sweetness. If using frozen ones, squeeze out any excess liquid prior to mixing. About 4 medium ripe bananas provide 1 cup.
– **Flour**: This recipe calls for all-purpose flour as the main ingredient. You may substitute up to ⅔ cup of it with whole wheat flour. Spoon and level the flour for a light, airy banana bread.
– **Butter**: Use unsalted butter. If using salted butter, omit the salt. You can substitute some of the butter with oil for added moisture.
– **Sugar**: Sugar imparts the sweet flavor and soft texture to this banana bread, so don’t skip, swap, or reduce it.
### Banana Bread Variations
One of the greatest features of banana bread is the options for customization:
– Incorporate nutmeg or substitute pumpkin pie spice for cinnamon.
– To create banana nut bread, include toasted nuts like walnuts or pecans.
– Garnish the loaf with pumpkin seeds or sunflower seeds.
– Mix in mini chocolate chips, raisins, or shredded coconut.
### How to Make Banana Bread
Making the perfect banana bread is simple with just a few straightforward steps:
1. Whisk together the dry ingredients.
2. Cream together the butter and sugar. Incorporate bananas, eggs, and vanilla.
3. Combine dry ingredients with wet ingredients. Mix well.
4. Bake until a toothpick inserted comes out clean.
#### Additional Tips
– To hasten the ripening of bananas, bake them in the oven at 350°F until the peels blacken, around 15 minutes. Allow to cool before using.
– Mix just until combined to keep the banana bread tender and moist.
– Oven temperatures can differ. Check the loaf early and avoid overbaking.
– If the top browns too swiftly, tent it with foil towards the end of baking.
– Allow the loaf to cool completely before slicing for neat, even pieces.
### How to Store Banana Bread
– For optimal results, store moist banana bread in an airtight container at room temperature for up to 4 days.
– Freeze loaves or slices by tightly wrapping them in plastic wrap or placing them in an airtight container for up to 4 months.
– Warm slices quickly in the microwave or toaster for a soft, comforting treat.
### Ripe Banana Recipes
Did you enjoy this Banana Bread recipe? Share your rating and thoughts below!

15 Simple Dishes Highlighting Protein-Packed Tuna Recipes
These simple tuna recipes transform canned tuna into swift lunch ideas and tasty dinners! They’re high in protein, budget-friendly, and come together in no time, ideal for meal prepping.
Here’s a tip for a meal that’s economical, easy to prepare, and has a long shelf life: a can of tuna. It may seem a bit classic, but canned tuna is rich in protein and omega 3’s, making it a simple and cost-effective meal option.
I’ve dedicated years to perfecting tuna recipes in my kitchen, discovering how adaptable and flavorful this protein can be! It’s budget-friendly, shelf-stable, packed with protein, and cooks more quickly than nearly anything else in your kitchen. Here are some of my top canned tuna recipes that create easy meals.
15 Tuna Recipes for Easy Meals
These patties made from canned tuna are flavorful on the inside and golden crispy on the outside, seasoned with Old Bay, parsley, and Dijon mustard. You can serve them like traditional burgers with all the condiments or on a bed of greens. They vanish quickly at my home (my kids especially enjoy them!).
This tuna rice bowl recipe is a simple dinner option that’s ready in 20 minutes! A blend of savory tuna, fresh cucumber, and spicy mayo creates a fulfilling weeknight meal that’s wallet-friendly and high in protein. 20 grams of protein and under $5 per serving!
This protein-rich salad is a favorite among readers: blend canned tuna with crunchy veggies, feta cheese, olive oil, and a kick of Dijon mustard for a tasty salad that works great over greens or with crackers. This recipe perfectly fits into my Mediterranean diet meal plan and doesn’t taste like an ordinary tuna salad.
Crusty bread hugs a creamy, savory blend of tuna and crunchy vegetables, topped with melty cheddar and a ripe, juicy tomato! As an author of cookbooks, it’s unexpectedly one of my preferred comfort foods: each bite is sheer melted bliss.

Protein-Packed Tahini Hot Cocoa Recipe
# Indulgent Protein-Packed Tahini Hot Chocolate
If you’re in search of a luxurious, refined hot chocolate made with nutritious components, this recipe is for you! We’ve been indulging in this creamy, tahini-enhanced, fantastical hot chocolate, which has even won over cocoa enthusiasts.
Even though it’s sweetened naturally and combined with water, it boasts the perfect sweetness, a rich chocolate flavor, and a smooth finish. It cleverly incorporates healthy fats, fiber, protein, and cinnamon to help regulate blood sugar levels. Savor it as is or top it with your preferred whipped cream for the ultimate comforting delight.
## Protein-Packed Tahini Hot Chocolate Ingredients
This is not your standard hot chocolate! It’s exceedingly creamy, lavish, and packed with healthy ingredients. Here’s what you will need to whip it up:
– **Cocoa powder** – a plentiful amount of cocoa powder ensures this beverage is extremely chocolaty, almost akin to a drinking chocolate!
– **Tahini** – tahini is one of our favorite ingredients for its health advantages (hello vitamins, minerals, and healthy fats), and it contributes a beautiful thickness, richness, and nutty taste to this hot chocolate.
– **Sweetener** – we enjoy a mix of maple syrup (or honey) and a medjool date, but you can substitute almost any sweetener here. The date imparts a caramel-like taste and enhances the creaminess!
– **Sea salt** – a small pinch is all it takes to elevate the flavors. Furthermore, salt + tahini + maple = MAGIC!
– **Cinnamon** – provides a hint of additional sweetness and benefits for blood sugar balance.
– **Collagen** – if you’re into protein-rich hot chocolate, do include the collagen! Together with the tahini, it gives one serving of hot chocolate a substantial 15 grams of protein and adds more creaminess. If you’re vegan, your hot chocolate will still be wonderful without it!
– **Coconut milk powder + water // milk of choice** – there are plenty of options when it comes to selecting your milk. We like a combination of coconut milk powder and hot water to create a super creamy, rich dairy-free “milk,” but you can easily use coconut milk for both or opt for another milk you favor (almond, oat, and cashew would all be fantastic).
## How to Prepare Tahini Hot Chocolate
When it’s time for hot chocolate, mix everything (including the hot water) in a heat-safe blender (one that has a lid with a vent to allow steam to escape). Blending makes it extra frothy and helps break down the date. Avoid sealing the container tightly, as hot liquids can cause pressure to build, potentially leading to an explosion.
What if you lack a heat-safe blender? Or any blender at all? You could make this beverage in a saucepan on the stovetop and use coconut sugar (or another sweetener) in place of a date. Optionally, you could then use a handheld frother to achieve creaminess and frothiness!
We can’t wait for you to test this hot chocolate! It’s:
– Luxurious
– Creamy
– Chocolaty
– Perfectly sweet
– Frothy
– Fantastical
– Fiber- & Protein-packed
– Nourishing
– SO scrumptious!
This is the ideal cozy drink for the holiday season, for recharging after frolicking in the snow, or any moment you crave something indulgent yet nourishing. It pairs beautifully with holiday cookies, particularly anything chocolatey.
## More Cozy + Nutrient-Rich Beverages
If you give this recipe a try, let us know! Leave a comment, give it a rating, and don’t forget to tag a photo on Instagram. Cheers!
### Recipe
**Prep Time:** 5 minutes
**Total Time:** 5 minutes
**Servings:** 1 (12-ounce) serving
### Ingredients
– 2 Tbsp cocoa powder
– 1 Tbsp tahini
– 1 pitted medjool date (or 2 tsp coconut sugar, or other preferred sweetener)
– 1/2 tsp maple syrup or honey (if not vegan)
– 1 pinch sea salt
– 1 pinch ground cinnamon
– 2 Tbsp collagen peptides (omit if vegan)
– 2 Tbsp coconut milk powder (or leave out and substitute the hot water with warmed milk of choice)
– 1 ¼ cup very hot water (or milk of choice)
### Instructions
1. For optimal results, combine all ingredients in a high-speed blender with a vented lid to allow steam to escape. If you don’t possess a blender, heat on the stovetop, skip the date, and replace it with additional sweetener of choice (or blend ingredients with cold
Read More
Shepherd’s Pie featuring Sweet Potato and Turkey
Turkey Sweet Potato Shepherd’s Pie
Preparation Time: 15 minutes Cooking Time: 45 minutes Total Duration: 1 hour Servings: 6
A delightful shepherd’s pie featuring sweet potatoes, turkey, and a variety of vegetables!
Ingredients
- 1 1/2 pounds sweet potatoes, peeled and chopped
- 3 cloves garlic, peeled
- salt and pepper to taste
- 2 tablespoons oil (or butter)
- 1 pound ground turkey (or beef or chicken)
- 1 cup onion, chopped
- 1 cup celery, chopped
- 2 cloves garlic, minced
- 1 teaspoon rosemary, minced (or 1/2 teaspoon dried)
- 1 teaspoon thyme, minced (or 1/2 teaspoon dried)
- 1 teaspoon sage, minced (or 1/2 teaspoon dried)
- 2 tablespoons tomato paste (optional)
- 2 tablespoons all-purpose flour (gluten-free for gluten-free)
- 1 cup chicken broth (link) (or beef broth)
- 1 tablespoon Worcestershire sauce (gluten-free for gluten-free)
- 2 cups frozen peas and carrots (or frozen peas, or frozen vegetable mix)
- salt and pepper to taste
Instructions
- Combine the chopped sweet potatoes and whole garlic cloves in a pot, cover with water, bring to a boil, and cook until the sweet potatoes are soft, approximately 15-20 minutes.
- Drain the water and mash the sweet potatoes and garlic, seasoning with salt and pepper to taste, and set aside.
- In the meantime, heat the oil in a large skillet over medium-high heat, add the turkey, onion, and celery, and cook, breaking the turkey apart while it browns, for about 10-15 minutes.
- Incorporate the garlic, rosemary, thyme, sage, and tomato paste, sprinkle in the flour, stir, and cook for an additional minute.
- Pour in the broth and Worcestershire sauce, stir, bring to a boil, then reduce the heat and let simmer for 5 minutes.
- Stir in the frozen vegetables, allow them to heat through for about 5 minutes, then season with salt and pepper to taste.
- Transfer the meat mixture to the bottom of an 8×13 inch baking dish, and top with the mashed potatoes.
- Bake in a preheated 350F/180C oven until the edges are bubbling, roughly 20-30 minutes.
Optional: Stir melted butter into the mashed sweet potatoes.
Optional: Incorporate 1/4 cup heavy/whipping cream into the mashed sweet potatoes.
Optional: Mix in 1/4 cup grated parmigiano reggiano (parmesan cheese) to the mashed sweet potatoes.
Note: I used a package of frozen peas and carrots, which saved me time on dicing carrots. If you opt for just frozen peas, add 1 cup of diced carrots along with the onions.

A Simple Thai Basil Chicken Recipe
# If You’re Searching for a Super Tasty and Quick Dinner, This Thai Basil Chicken Stir Fry is Perfect for You
Thai basil chicken is a cherished dish that merges the lively flavors of Thai culinary traditions with the ease of a swift stir fry. This meal is not only scrumptious but also provides a fantastic taste return for little preparation time, making it an excellent selection for hectic weeknights.
## What is Thai Basil Chicken?
Thai basil chicken, referred to as “Pad Krapow Gai” in Thailand, is a favored stir-fry dish crafted with ground chicken or chicken pieces, Thai basil, garlic, Thai chilies, and a savory sauce. It’s typically served alongside fluffy white rice and may also be topped with a crispy fried egg. This dish is a staple for many when longing for genuine Thai flavors.
## How to Prepare Thai Basil Chicken Stir Fry
### 1. Prepare All of the Ingredients
Begin by making the sauce. In a small bowl, combine oyster sauce, soy sauce, dark soy sauce, and sugar. Mince the garlic, chop the chilies, rinse and dry the basil, and slice the chicken into uniform pieces.
### 2. Sauté the Aromatics
Heat oil in a wok or skillet. Add the minced garlic and chopped chilies, frying briefly until fragrant but not browned.
### 3. Cook the Chicken
Introduce the chicken to the pan and cook, stirring until it turns golden brown and is fully cooked.
### 4. Incorporate the Sauce
Stir in the prepared sauce and allow it to reduce slightly, ensuring the chicken is evenly coated.
### 5. Add the Basil
Take the pan off the heat and stir in the fresh basil. Serve immediately over rice.
## Ingredients Needed to Make Thai Basil Chicken
– **Sugar**: Provides a touch of sweetness to balance the flavors.
– **Oil**: For frying the components.
– **Garlic**: Minced for aromatic flavor.
– **Chicken**: Thighs are preferred for their juiciness, but breasts can also be used.
– **Oyster Sauce**: A crucial ingredient that adds depth and umami.
– **Soy Sauce**: Regular and dark soy sauce for flavoring and color.
– **Thai Chilies**: For heat; adjust according to your spice preference.
– **Thai Basil**: Essential for its distinct flavor; can be substituted with sweet basil if needed.
## Ground Chicken vs Chicken Thighs vs Chicken Breasts
Thai basil chicken can be prepared with ground chicken or chopped pieces of chicken thighs or breasts. Ground chicken is often chosen for its convenience, while larger pieces can offer a more substantial texture. Select based on your personal preference.
## What to Serve It With
This dish pairs wonderfully with fluffy white rice, which soaks up the flavorful sauce. You can also serve it over noodles or with a side of fresh cucumbers for a crunchy element. For added indulgence, think about topping it with a crispy fried egg.
## Is It Spicy?
Typically, Thai basil chicken has a spicy kick due to the presence of Thai chilies. However, you can modify the spice level by using fewer chilies or removing the seeds.
Relish this quick and simple Thai classic that delivers amazing flavors to your dinner table in roughly 20 minutes!
Read More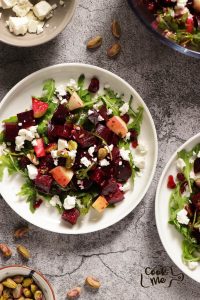
Balsamic-Dressed Beet Salad Recipe
**Discovering Adaptable Ingredients for a Scrumptious Salad**
When preparing a salad that excites the palate, the selection of ingredients is crucial. Here, we examine various adaptable choices to enhance your salad journey.
**Cheese Selections:**
Cheese can dramatically influence the texture and taste of a salad. Goat cheese, or chèvre, serves as a superb option for those desiring a creamier consistency. Its gentle flavor pairs well with numerous ingredients. For those leaning towards a more intense, saltier profile, crumbled feta or blue cheese, like gorgonzola, can serve as alternatives. These cheeses contribute a powerful taste that can be prominent in any salad.
**Nut Alternatives:**
Nuts provide a pleasing crunch and an added layer of richness to salads. While pistachios are frequently used, pecans, almonds, or walnuts can act as substitutes. Each nut delivers its distinct flavor and texture, permitting personalization based on individual taste or what’s on hand.
**Prep-Ahead Advice:**
Streamlining your kitchen process can improve the overall cooking experience. Roasting beets up to five days prior and keeping them in the refrigerator can be time-efficient. Likewise, making the vinaigrette a week ahead allows for quick assembly just before serving, ensuring optimal texture and freshness.
**Using Pre-Prepared Beets:**
For those pressed for time, utilizing pre-cooked beets is an efficient choice. Simply drain, slice, and add them to your salad. This approach greatly cuts down prep time without sacrificing flavor or nutritional benefits.
**Vinegar Choices:**
The type of vinegar can alter the dressing of a salad. While balsamic vinegar is appreciated for its sweet notes, red wine vinegar provides a zestier option. This change can create a dressing that is less sweet yet just as flavorful, accommodating various taste preferences.
By investigating these ingredient choices and preparation strategies, you can craft a salad that is not only tasty but also customized to your preferences and convenience.
Read More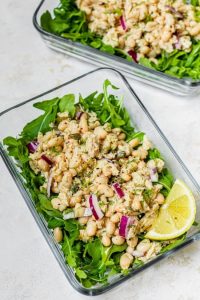
High-Fiber Meal Suggestions: Breakfast, Lunch, and Dinner Recipes featuring 8g+ Fiber
**Fiber-Rich Meal Suggestions: Breakfast, Lunch, and Dinner Recipes Featuring 8g+ Fiber**
Integrating fiber-rich meals into your everyday eating habits is crucial for upholding digestive wellness, regulating blood sugar levels, and fostering a sense of satiety. Below are some appetizing and healthful meal suggestions for breakfast, lunch, and dinner, each containing at least 8 grams of fiber.
**Breakfast: Chia Seed Pudding Prepared Overnight**
*Ingredients:*
– 3 tablespoons chia seeds (10g fiber)
– 1 cup unsweetened almond milk
– 1 teaspoon vanilla extract
– 1 tablespoon maple syrup or honey
– 1/2 cup mixed berries (2g fiber)
– 1 tablespoon sliced almonds (1g fiber)
*Instructions:*
1. In a mixing bowl, blend chia seeds, almond milk, vanilla extract, and sweetener. Mix thoroughly.
2. Cover and let it chill in the fridge overnight.
3. In the morning, stir the pudding and garnish with mixed berries and sliced almonds.
*Total Fiber: 13g*
**Lunch: Black Bean and Quinoa Salad**
*Ingredients:*
– 1 cup cooked quinoa (5g fiber)
– 1 cup canned black beans, rinsed and drained (8g fiber)
– 1/2 cup cherry tomatoes, cut in half (1g fiber)
– 1/2 avocado, cubed (5g fiber)
– 1/4 cup red onion, finely diced (1g fiber)
– 1/4 cup fresh cilantro, chopped
– Juice of 1 lime
– Salt and pepper to taste
*Instructions:*
1. In a sizable bowl, combine quinoa, black beans, cherry tomatoes, avocado, red onion, and cilantro.
2. Drizzle with lime juice and season with salt and pepper.
3. Gently toss to combine and serve cold or at room temperature.
*Total Fiber: 20g*
**Dinner: Vegetable and Lentil Stir-Fry**
*Ingredients:*
– 1 cup cooked lentils (15g fiber)
– 1 cup broccoli florets (5g fiber)
– 1 red bell pepper, sliced (2g fiber)
– 1 carrot, sliced into thin strips (2g fiber)
– 2 tablespoons soy sauce
– 1 tablespoon sesame oil
– 2 cloves garlic, minced
– 1 teaspoon grated ginger
*Instructions:*
1. Heat sesame oil in a large skillet over medium heat. Add garlic and ginger, sauté for 1 minute.
2. Introduce broccoli, bell pepper, and carrot. Stir-fry for 5-7 minutes until veggies are tender-crisp.
3. Add in cooked lentils and soy sauce. Mix well and cook for an additional 2-3 minutes.
4. Serve hot, garnished with sesame seeds if you wish.
*Total Fiber: 24g*
These fiber-rich meal suggestions not only fulfill your daily fiber requirements but also present a range of flavors and textures to keep your meals vibrant and satisfying. Relish these recipes as part of a balanced diet to enhance your overall health and wellness.
Read More
Weekly Meal Schedule for January 12, 2026
### Discover Tasty New Recipes Every Day
In our fast-moving society, the pleasure of cooking often takes a backseat to quick and easy solutions. Nevertheless, the thrill of experimenting with new recipes can rekindle your enthusiasm for cooking and add diversity to your dining experiences. By signing up for daily recipe updates, you can delve into a treasure trove of culinary delights straight from your inbox. Here’s why you should think about subscribing to daily recipes and how it can revolutionize your cooking journey.
#### Advantages of Daily Recipe Updates
1. **Diversity and Motivation**: Daily recipe emails offer a continuous flow of fresh ideas, enabling you to escape the routine of your standard meal schedule. You’ll uncover a range of cuisines, seasonal ingredients, and inventive cooking methods that can ignite your culinary imagination.
2. **Time Efficiency**: With a handpicked collection of recipes sent to you, you can cut down on meal planning time. Say goodbye to the endless search through cookbooks or online recipes; you’ll have a pre-prepared list of tasty choices every day.
3. **Skill Enhancement**: Experimenting with new recipes can improve your cooking abilities. As you play with various ingredients and techniques, you’ll build confidence in the kitchen and broaden your culinary skills.
4. **Nutritional Balance**: A lot of recipe subscriptions emphasize wholesome meals that cater to different dietary needs, such as vegetarian, gluten-free, and low-carb diets. This can assist you in upholding a healthier eating pattern while still savoring delectable dishes.
5. **Community and Connection**: Enrolling in a recipe service often links you with a community of like-minded cooking aficionados. You can exchange experiences, insights, and even tweaks to recipes, nurturing a sense of camaraderie and encouragement.
#### How to Sign Up
Subscribing to receive daily recipes is generally an easy task. Most platforms ask you to enter your email address and accept their terms, often including a GDPR compliance checkbox. Once subscribed, you’ll begin receiving daily emails that showcase new recipes, cooking advice, and occasionally even exclusive features.
#### Unsubscribing and Adaptability
One of the significant benefits of these services is the flexibility they provide. If you ever find it too much or want to pause, you can quickly unsubscribe at any time. Most email communications will feature an “unsubscribe” link, making it easy to opt-out.
#### Stay Connected on Social Media
Alongside email updates, many recipe providers have a vibrant presence on social media platforms like Facebook, Instagram, Pinterest, and TikTok. Following them can offer even more inspiration, including cooking demonstrations, tips, and community interaction.
#### Final Thoughts
Taking advantage of the chance to receive delightful new recipes every day can dramatically improve your cooking experience. With an abundance of choices at your disposal, you can explore new tastes, refine your cooking skills, and relish the joy of meal preparation. Sign up today and embark on your culinary journey!
Read More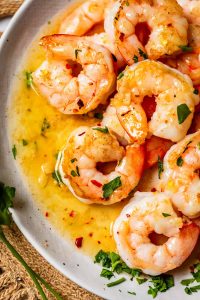
Rapid and Tasty Shrimp Pasta Recipe Prepared in Moments
### Fresh Shrimp Pesto Pasta: A Fast and Tasty Dinner
This shrimp pesto pasta is a delicious meal that can be whipped up in just 20 minutes. With pan-seared shrimp, succulent grape tomatoes, and vibrant basil pesto, it’s a straightforward yet savory dinner choice that your family will enjoy.
#### Flavor Profile
The mix of succulent shrimp, lively pesto, and slightly charred tomatoes delivers a fresh and tasty experience in every bite. The dish is not only appetizing but also visually stunning, making it ideal for any dinner setting.
#### Why It Works
Cooking the shrimp and tomatoes independently is essential for keeping the shrimp tender while letting the tomatoes enhance their sweetness. This technique avoids a watery sauce, guaranteeing a rich flavor.
#### Cooking Technique
Blistering the tomatoes boosts their inherent sweetness and adds complexity to the dish, maintaining the overall flavors fresh and uncomplicated.
#### Recommended Tools
– **Large Skillet:** For skillet-cooking the shrimp.
– **Pot:** For boiling the pasta.
#### Ingredient Swaps
Feel free to choose your preferred pasta shape or swap shrimp with chicken, scallops, crab, or lobster for a new twist.
### What You’ll Need:
– **Spaghetti:** Regular or whole wheat spaghetti is suitable, or you can opt for long pasta like linguine or fettuccine.
– **Shrimp:** Fresh or frozen medium shrimp work well. For ease, buy peeled and deveined shrimp.
– **Grape Tomatoes:** Blistering these over high heat enhances their sweetness. Cherry tomatoes are also a great alternative.
– **Pesto:** Both homemade and store-bought pesto are appropriate. If opting for store-bought, choose one made with real basil and olive oil.
– **Parmesan Cheese:** Freshly grated Parmesan melts better and boosts flavor.
– **Seasonings:** Keep it straightforward with salt, pepper, and dried oregano. Optional: add red pepper flakes for spice and finish with fresh basil.
### From Start to Finish
This recipe is quick, so having all ingredients prepped ahead of time is advisable.
1. **Cook Pasta:** Boil pasta until al dente and save some cooking water.
2. **Prepare Shrimp:** Season and sear shrimp, then set aside.
3. **Blister Tomatoes:** Cook tomatoes until they begin to blister, then remove from heat.
4. **Combine:** Mix pasta with pesto and incorporate shrimp back in, garnishing with Parmesan and fresh basil.
### Tips for Success
– Pat the shrimp dry prior to cooking for a great sear.
– Incorporate pesto off the heat to keep its vibrant color and flavor.
– If the pesto is thick, thin it with warm pasta water for better coating.
– Cook shrimp for about a minute per side; they are done when they become pink and curl into a C shape.
### Leftovers Made Easy
Store shrimp separately in an airtight container for up to 4 days. While leftovers can be combined, freezing is not advisable. Pesto may darken in the fridge but will still taste fantastic. Reheat gently on low heat, adding a splash of water if necessary.
### Nutritional Information (per serving)
– **Calories:** 702
– **Carbohydrates:** 73g
– **Protein:** 39g
– **Fat:** 28g
– **Saturated Fat:** 5g
– **Cholesterol:** 192mg
– **Sodium:** 981mg
– **Potassium:** 786mg
– **Fiber:** 5g
– **Sugar:** 7g
This shrimp pesto pasta is not only swift and easy to make but also bursting with flavor, earning it a spot as a perfect option for a weeknight dinner. Savor your delicious creation!
Read More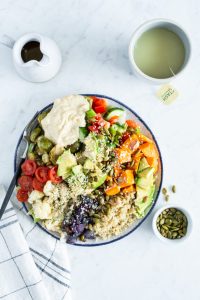
35 Tasty Recipes for Your Super Bowl Celebration
Alex & Sonja Overhiser: The Culinary Partners Behind A Couple Cooks
Introducing Alex and Sonja Overhiser, the vibrant husband-and-wife duo who have transformed their love for cooking into a successful online community. As the creators of two acclaimed cookbooks and the originators of the well-known site A Couple Cooks, Alex and Sonja have been motivating home chefs across the globe since 2010. Their adventure began with a straightforward goal: to spread the joy of cooking through uncomplicated, seasonal recipes that anyone can prepare.
Over time, A Couple Cooks has evolved into an extensive platform for food lovers, featuring thousands of original recipes, valuable cooking tips, and useful meal planning suggestions. Each recipe is carefully designed and photographed by Alex and Sonja, ensuring that their signature style is reflected in every dish. Their culinary delights are not only tested in their own kitchen but also by their children, making their recipes approachable and family-friendly.
Alex and Sonja’s cooking philosophy highlights the importance of fresh, seasonal ingredients, motivating their audience to adopt a healthier and more sustainable way of living. Their recipes range from swift weeknight meals to intricate weekend celebrations, appealing to both beginner cooks and experienced chefs. The couple’s commitment to quality and authenticity has garnered them a devoted following, along with acknowledgment in the culinary arena.
In addition to their website, Alex and Sonja have penned two cookbooks that further highlight their culinary skill and innovation. These publications stand as a tribute to their dedication to making cooking accessible and enjoyable for all. As busy parents, they empathize with the difficulties of juggling family responsibilities while nurturing a passion for cooking, and they aim to offer solutions that simplify meal prep and make it more enjoyable.
Through A Couple Cooks, Alex and Sonja Overhiser keep motivating a worldwide community of food enthusiasts, demonstrating that cooking together can be an enjoyable and fulfilling endeavor. Whether you’re searching for a new recipe to explore or looking for inspiration for your next meal, Alex and Sonja’s work illustrates the unifying power of cooking to bring people together and forge lasting memories.
Read More